 |
 Home Tutorials
Beginners Classes Home Tutorials
Beginners Classes
06 Using the Paint Brush and Air Brush
|
|
|
Using the Paintbrush and Air Brush
Created by: Charith
Modified by: PSPUG Learning Center
|

|
|
|
Paint Shop Pro comes equipped with a number of tools that
allow you to paint or draw. We have already used one of the
tools, the Fill tool. This week we will learn about some of
the other more commonly used tools.
|
|
|
Using the Paintbrush, An Introduction:
Open a new image: (Width and Size of your choice)
- Click on File || New
- Width: 200
- Height: 200
- Background color: Transparent
- Image type: 16.7 Million Colors
- Minimize this Canvas
- Click OK
(Note: We need a canvas for the PAINT BRUSH TOOL to be Activated.
Without a New Canvas, no Tools are available.)
In the TOOL PALETTE Click on the PAINT BRUSH ICON (looks like a Paint Brush) and just explore the following:
|
|
 |
- PSP5: With the TOOL CONTROLS Tab Active Different PAPER TEXTURES that one may choose by clicking on the Down Arrow and selecting a
texture from the Drop Down Menu.
|
|
 |
- PSP5: With the BRUSH TIP Tab Active, Different PAPER TEXTURES that one may choose are available by clicking on the Down Arrow and selecting a texture from the Drop Down Menu.
|
|
 |
- PSP6 & PSP7: With the PAINT BRUSH Tab Active various options are
available including SHAPES (brush tips) by clicking on the down
arrow for a drop down menu, Size of tip, Hardness, Opacity, Step, & Density
|
|
 |
- PSP6: With the PAINT BRUSH OPTIONS Tab Active, Different PAPER TEXTURES that one may choose are available by clicking on the Down Arrow and selecting a texture from the Drop Down Menu.
|
|
 |
- PSP7: To select TEXTURES, Use the COLOR PALETTE and click on
the Right Arrow in the Texture Palette and then select the TEXTURE Icon.
|
|
 |
- Then, Click in the TEXTURE PALETTE to get the Texture Window
- Then, Click on the Down Arrow for a drop down display of
available textures
- Select the texture wanted
|
|
 |
- You have another Paint Brush Option of BRUSH TYPES
- Click on the BRUSH TYPE Icon (at right) for a Drop Down Menu
- Normal and Paintbrush are the default settings
- Pen, Pencil, Marker, Crayon, Chalk, Charcoal change the brush
tip accordingly.
|
|
 |
- The CUSTOM (not available in PSP5) setting allows one to choose from a number of
preset shapes for the paint brush.
- PSP6 has 12 shapes
- PSP7 has 35 shapes
- Click on the Down Arrow for a drop down menu of shapes and
select the shape wanted
|
|
|
|
One of the best ways to learn how the Paint Brush Works and Looks
is to just experiment with the various options and settings.
Set your COLOR PALETTE Foreground and Background Colors (PSP7 the
Styles Palette). On a Canvas, use the LEFT Mouse Button for the
Foreground Color, the RIGHT Mouse Button for the Background Color.
You can start with a Transparent Image, or an Image with a Colored
Background, or Use a Picture, or, Other Image you have created.
Many possibilities and variations are available for unique and
interesting results.
If you use the SELECTION TOOL and Select an area, then only that
area will reflect the Paint Brush Options you have selected.
|
|
|
|
Task: Creating a Frame Around a Picture
|
|

|
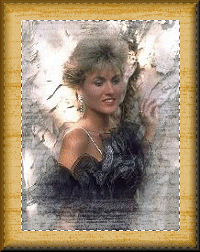
In this exercise, we will use a Picture and create a frame around it
using the Paintbrush with a texture of Woodgrain.
Use any Picture you want, or use the Picture from the Download given above, (pbrushcustomdnld.jpg) or Download the Picture here.
Duplicate the Picture to preserve the original:
- Use the file menu, WINDOW || DUPLICATE
- Close the Original Image
Set Colors:
- Foreground = White (255,255,255)
- Background = Brown (192,128,0)
(Note: PSP7 - Make sure in the COLOR PALETTE that the Styles Palette are set to SOLID and your Texture Palette are set to NULL. [Click on the right arrow in TEXTURES and select the right most Icon.])
|
|
|
Create a Border: IMAGE || ADD BORDERS
- Symmetric = Checked
- Value in any other setting = 20
- (Note: When Symmetric is checked any value set will automatically
be set in all other settings)
In TOOL PALETTE
- Use MAGIC WAND
- Click cursor on the Border
|
|
|
|
Paint Brush Settings:
In TOOL PALETTE
- PSP5
- Select the PAINT BRUSH Tool
-
Click on Tool Controls Tab
- Paper Texture = Woodgrain
-
Click on Brush Tip Tab
- Shape = Round
- Size = 100
- Opacity = 50
- Hardness = 10
- Density = 50
- Step = 5
- Click on OK
- PSP6
- Select the PAINT BRUSH Tool
-
Click on the Paint Brush Tab
- Shape = Round
- Size = 100
- Hardness = 10
- Opacity = 50
- Step = 5
- Density = 50
-
Click on the Paint Brush OPTIONS Tab
- Paper Texture = Woodgrain
- Build Up Brush = Unchecked
- Click on OK
- PSP7
- Select the PAINT BRUSH Tool
-
Click on the Paint Types Tab
- Normal = Checked
-
Click on the Paint Brush Options Tab
- Shape = Round
- Size = 100
- Hardness = 10
- Opacity = 50
- Step = 5
- Density = 50
- Build UP = Unchecked
- Click on OK
-
In the COLOR PALETTE
- Click on Right Arrow in the TEXTURES Foreground Palette Box
- Click on the TEXTURES Icon
-
Click on the Textures Palette Box for the Textures Window
- Click on the Down Arrow in the Window
- Select 'WOODGRAIN'
- Click on OK
|
|
|
|
PAINT by putting cursor on the canvas, hold mouse button down,
and drag around the frame area.
The result is a Yellow Woodgrain Effect.
|
|

|
Create a 3D Effect on the Frame
- PSP5 & PSP6: IMAGE || EFFECTS || BUTTONIZE
- PSP7: EFFECTS || 3D EFFECTS || BUTTONIZE
- Height = 12
- Width = 12
- Opacity = 100
- Transparent Edge = Checked
- Auto Proof = Checked
- Click on OK
- DESELECT selection: SELECTIONS || NONE or CONTROL + D
|
|
|
|
Task: Using the Air Brush:
The Airbrush Tool (looks like a Spray Can) simulates a
Spray Can. The Airbrush comes with options similar to
the Paintbrush tool. As with any tool, experiment by
changing the values of different options and see how
different effects are created.
CREATE A SIMPLE BACKGROUND
Set the Colors (Solid)
- Foreground = Light Steel Blue (0,160,192)
- Background = White (255,255,255)
Click on the AIR BRUSH Tool (Looks like a Spray Can)
- PSP5: Tool Controls Tab: Paper Texture = WEAVE
- PSP5: Brush Tip Tab:
- Shape = Round
- Size = 50
- Opacity = 75
- Hardness = 5
- Density = 5
- Step = 5
- PSP6: Air Brush Tab
- Shape = Round
- Size = 50
- Opacity = 75
- Hardness = 5
- Density = 5
- Step = 5
- Brush Types = Normal
- PSP6: Air Brush Options Tab: Paper Texture = WEAVE
- PSP7: Air Brush Options Tab
- Shape = Round
- Size = 50
- Opacity = 75
- Hardness = 5
- Density = 5
- Step = 5
- Brush Types = Normal
- PSP7: Brush Types = Normal
- PSP7 COLOR Palette
- Styles Palette set to Solid (Click on Right Arrow, Select
the Paint Brush Icon)
- Texture Palette set to Texture (Click on Right Arrow, Select
Texture Icon)
- Click on Palette for the Textures Window
- Click on Down Arrow and scroll to Select the WEAVE texture
|
|

|
New Canvas
- FILE || NEW
- Width & Height = 100
- Background = White
- Type = 16 M Colors
Paint the Canvas by Left Click in canvas, holding down mouse button,
and dragging it around for the texture. The more time spent,
the darker the image. If image is too dark, Right Click for Background
Color. If not satisfied with result, click on DELETE Key and start
again.
|
|

|
Add Noise
- PSP5 & PSP6: IMAGE || NOISE || ADD
- PSP7: EFFECTS || NOISE || ADD
- Noise = 20%
- Click on OK
SAVE the image as a JPG file: FILE || SAVE AS || blueweave.jpg and
then use it as a background image for Web Pages and/or html enhanced
email.
|
|
 
|
Some Additional Examples:
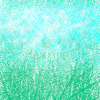
- Top Left:Used Ocean on canvas and then Clouds on Top Part
- Top Right: Used Fruit Peel
- Bottom: Grass on whole canvas, top half with cyan and lunar texture,
and then top half white with Clouds texture.
Have Fun :o)
|
|
|
Next week we will be covering Custom Colors so stay tuned : )
|
