|
Creating Calendars |
||||
|
|
|||
|
Printout Calendar Desktop Calendar Image of a Calendar |
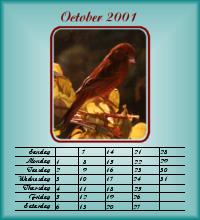
We will first make a calendar page for a printout calendar to hang on the wall; then we'll take that to make a desktop calendar; and at the end we'll take it to create an image of a calendar. The example here is for October 2001, but can of course be done for every other month as well. | |||
|
To follow this tutorial, you should download File 1 on the left which is a template for the days and dates for our calendar. In case you haven't got a picture available, you can download File 2 which is a photo of my bronze canary hen Ruby; with her colours I think she's quite nice for an October calendar page. | |||
|
|
Printout CalendarOpen a new image: For the dimensions, I myself worked with the DIN-A 4 format (21x29.7 cm) which is used in Germany, but of course it can also be letter format (8.504x10.984 inch) or any other format. |
|||
| Since this is a large image it will be a big file, so don't forget to save often! | ||||
|
|
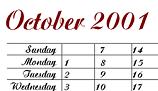
Open the "calendar_dates" file from your download. This file consists of a vector layer with the days and dates for a month with 31 days, beginning on a Monday (which by chance is true for October 2001). Since these are all vectors it can be altered easily if you want to create calendar pages for coming months; just select them with your Vector-Object Selection tool to move them around, right-click on text to edit it to another language, colour or font, etc. After moving the single vector objects around, you can align them properly again with the commands in the Objects || Align menu. | |||
| Go to Edit || Copy (Ctrl+C), then to Edit || Paste || As a New Layer (Ctrl+L). Right-click on the layer in your Layer palette, choose "Rename" from the context menu and type in "Dates". | ||||
|
|
Click on the Vector-Object Selection tool in your Tool palette. Right-click into your image and choose "Select All" from the context menu; right-click again and choose "Group" from the context menu. This makes the many objects of this layer to one object for moving around. Take the layer with the mouse and drag it downwards, as far to the bottom of your image as you want it to be. Now go to Objects || Align || Horizonatl. Center in Canvas to center the layer horizontally in your image. Click somewhere into your image to deselect. |
|||
| Click on the "New Layer" icon in your Layer palette to create a new layer, name it "Month". | ||||
|
Click on the Text tool in your Tool palette and then into your image, above the part with the days and dates: Type in "October 2001", click on OK and drag the text to its place with the mouse, then deselect by right-clicking into the picture or with Ctrl+D (Selections || Select None). |
|||
|
|
Open Ruby.jpg from your download (or another picture of your choice). Go to Edit || Copy (Ctrl+C), switch back to your calendar image and go to Edit || Paste || As a New Layer (Ctrl+L) to paste it into your image as a new layer. Then close the jpg file. If the photo is too big or too small now, go to Image || Resize: |
|||
|
|
Your Mover tool has been activated when you pasted the photo as a new layer, so drag the picture into its place now, above the month's name. Right-click on this layer in your Layer palette, choose "Rename" from the context menu and type in "Picture". | |||
|
|
Click on the Selection tool in your Tool palette: Selection type = Rounded Rectangle Feather = 10 Antialias = checked |
|||
 |
Begin with your selection in the top left corner of the picture and draw it to the bottom right corner. Go to Selections || Invert and hit the Delete key (Edit || Clear) 5 times. Deselect by right-clicking into your image or with Ctrl+D (Selections || Select None). | |||
|
|
Click on the Preset-Shapes tool in your Tool palette: Shape type = Rounded Rectangle Retain style = unchecked Antialias = checked Create as vector = checked Line width = 2 Line style = Default line |
|||

|
Set your Foreground Style to Solid Color (click on the little arrow in your Foreground-Style box and choose the little brush icon on the left) and your Background Style to None (click on the little arrow in your Background-Style box and choose the icon on the right), then click right into the Foreground-Style box and choose the same red that we had before for the month's name (Red = 128, Green = 0, Blue = 0). Your textures should both be set to None. | |||
| Check the "Lock" option below your Texture boxes so that we don't have to do all these settings again with every tool we use. | ||||

|
Draw a rounded rectangle around the picture, leaving a little space between picture and "frame". Since this is a vector shape, you can make it larger or smaller afterwards by dragging at the handles. With the rounded rectangle still selected, go to Objects || Align || Horz. Center in Canvas. Then click on the Mover tool in your Tool palette and center the picture in the rectangle. Right-click on the new vector layer in your layer palette, choose "Rename" from the context menu and type in "Frame". | |||

|
This completes your calendar page for the printout calendar. If you want to make a whole calendar, you can draw a line on top of that page (on an extra layer), about half an inch (1.5 cm) from the top edge of your image. Leave some spaces in the middle and next to the sides. You can then cut those lines in before stapling the pages at the top, so that you can easily tear off the single pages. Create those lines as vector lines on another vector layer, and keep your Shift key pressed while drawing them so that they become really straight. Afterwards activate the Vector Object Selection tool in your Tool palette, keep the Shift key pressed again while clicking on the single line parts to select them all, then go to Objects || Align || Top so that they are all in one line. | |||
|
|
Desktop CalendarSave your image and duplicate it with Shift+D (Window || Duplicate), then close the original image. |
|||
|
|
Now for the desktop calendar, first delete the layer with your cutting lines, then rearrange the calendar elements with the Mover tool so that the month's name is on top, above the picture. Since the normal desktop with a resolution of 600x800 pixels is smaller than our calendar page, try also to put the single elements as close together as possible. | |||
|
|
Click on the Background layer in your Layer palette and delete it (click on the little trash icon on top in your Layer palette). Then double-click on the Crop tool in your Tool palette to open the "Crop Area" dialog box, check "Select opaque area - merged", click on the OK button and then on the "Crop Image" button in the Tool Options palette. Now you've only that area of your image left that is really occupied by your calendar. | |||
| In my case, the image was now 549x683; for a desktop of 800x600, it must still be smaller. So go to Image || Resize, but check "Resize All Layers" this time. The dimensions of my image were 412x512 now. | ||||
|
|
If the background colour of your desktop looks nice as a background for the calendar, you can now add a new layer, drag it to the bottom in the Layer palette, fill it with your desktop background colour and save it. My background colour (Red = 0, Green and Blue = 128) wouldn't look so nice here, so I had to find a way to both have a nice background for my calendar image and keep my background colour. | |||
| First, increase the canvas size: Go to Image || Canvas Size: New width = 450 New height = 550 Center Image Horizontally/Vertically = both checked |
||||
| Create a new layer and drag it to the bottom in your Layer palette. Now you can fill it with a texture that looks good to your background, or with a gradient, or whatever you like. | ||||
|
For my desktop calendar, I filled the background with a rectangular foreground-background gradient, with foreground colour white and background colour a blue (Red = 0, Green and Blue = 128). In the Gradient Editor dialog box, I slid the marker between the two colours from 50 to 95 which gave me sort of a big button effect. Save your desktop calendar as a .bmp file to the Windows folder; if you display the Windows Active Desktop as a webpage you can also save it as a .jpg file. Then put it as a background image on your desktop: Right-click on your desktop and choose "Properties" from the context menu, then select your desktop-calendar image from the Background-Images list. It will look best, of course, if you choose "Center" for the display mode. |
|||
|
|
Image of a CalendarNow for our last project, the image of a calendar: Open the original calendar page again, duplicate it with Shift+D (Window || Duplicate) and close the original image. Go to Image || Resize, type in 50 for the Percentage of Original and leave other settings as are, then again to Image || Resize with 75 for Percentage of Original. Your image should now have the right size to work with. The dimensions of my image were 223x315 now. I will work with this size in future steps, so in case your image has got other dimensions go to Image || Canvas Size: |
|||
|
|
It's possible that you've got transparent areas around your image now. In that case, click on the background layer in your Layer palette, then click on the Flood-Fill tool in your Tool palette: Blend mode = Normal Match mode = None Tolerance = n/a Opacity = 100 Sample merged = unchecked |
|||
| Make white your Foreground Colour and click into the image to fill the background layer with white. | ||||
|
|
Delete the layer with the cutting line on it (select the layer in the Layer palette and click on the little trash can) since we don't need that anymore. Then turn your background layer invisible (click on the little glasses next to its name in the Layer palette), make sure one of the other layers is the active layer and go to Layers || Merge || Merge visible. | |||
| With the Mover tool, move the layer that's now named "Merged" a bit downwards, since we will need some space for the binding on top later. | ||||
| Turn the background layer visible and go again to Layers || Merge || Merge Visible, which leaves us with one layer now. | ||||
 |
Right-click on that layer and choose "Duplicate" from the context menu. Right-click on the upper layer, choose "Rename" from the context menu and type in "October", right-click on the bottom layer and rename it to "November". Click on the "October" layer to make it the active layer. | |||
 |
Now go to Effects || Geometric Effects || Page Curl: Back Color = a medium grey (Red/Green/Blue = all 128) Color = white Corner = the bottom right corner (3rd in the row) X = 350 Y = 300 Radius = 60 |
|||
|
|
Click on the Magic Wand tool in your Tool palette: Match Mode = RGB Value Feather = 10 Tolerance = 0 Sample merged = unchecked |
|||
 |
Click on the grey area in the bottom right corner of your image to select it, then press the Delete key (Edit || Clear) once to make the November page visible. Deselect by right-clicking into your image or with Ctrl+D (Selections || Select None). | |||
| Create a new layer in your Layer palette, name it "Binding". | ||||
|
|
Double-click on the Selection tool in your Tool palette to open the "Select Area" dialog box: Left = 0 Right = 223 Top = 0 Bottom = 15 |
|||
|
|
Click on the Flood-Fill tool in your Tool palette, make black your foreground colour and click into the selection to fill it with that colour. Deselect with Ctrl+D (Selections || Select None). | |||
 |
Then go to Effects || 3D Effects || Drop Shadow: Vertical/Horizontal offset = both 3 Opacity = 60 Blur = 5.9 Color = Black |
|||
 |
Now go to Image || Canvas Size: New Width = 233 New Height = 325 Center Image Horizontally/Vertically = both unchecked Top = 0 Bottom = 10 Left = 0 Right = 10 |
|||
| Create a new layer in your Layer palette, name it "Pages right"; create another new layer named "Pages bottom". Click on the "Pages right" layer to make it the active layer. | ||||
|
|
Double-click on the Selection tool in your Tool palette: Left = 223 Right = 233 Top = 0 Bottom = 315 |
|||
|
|
Click on the Flood-Fill tool in your Tool palette, make white your Foreground Colour and click into the selection to fill it with the colour. | |||
|
|
Switch to the "Pages bottom" layer in your Layer palette, and double-click on the Selection tool again: Left = 0 Right = 223 Top = 315 Bottom = 325 |
|||
| Click on the Flood-Fill tool in your Tool palette and floodfill again with white. Deselect with Ctrl+D (Selections || Select None). | ||||
 |
Now go to Effects || Texture Effects || Blinds: Switch back to the "Pages right" layer in your Layer palette and apply the Blinds effect again, but this time uncheck the "Horizontal" option. |
|||
|
|
Click on the Deformation tool in your Tool palette. Keep your Shift key pressed, and drag the center right handle of the deformation frame downwards until the bottom right handle meets with the image corner; then click on the Apply button in the Tool Options palette. | |||
 |
Switch back to the "Pages bottom" layer, click on the Deformation tool again, and this time (with Shift key pressed) drag the center bottom handle to the right until the bottom right handle meets with the image corner. Click the Apply button in the Tool Options palette again. If the two Pages layers don't meet properly, go to Edit || Undo (Ctrl+Z) and try again. | |||
| Go to Image || Canvas Size: New Width = 260 New Height = 350 Center Image Horizontally/Vertically = both checked |
||||
|
|
Click on the Drawing tool in your Tool palette: Type = Single Line Width = 1 Line style = Default line Antialias = checked Create as vector = unchecked Close path = unchecked |
|||
| Make black your Foreground Colour, click on the "Binding" layer in your Layer palette to make it the active layer, and drag it to the top in your Layer palette. | ||||
 |
Now keep the Shift key pressed and draw a line from the top of the binding along the pages on the right, then a line a little bit downwards (you may want to zoom in for that). | |||
 |
Before giving your image a drop shadow and a nice background, merge layers first with Layers || Merge || Merge visible. That's it! |
|||
