|
Liquid Metal Text |
||||
|
|
|||
| We'll use the Inner Bevel effect and one of the Color Adjustment features to create a text that looks like liquid metal. | ||||
|
|
First create a new image: – Width = 400 pixels – Height = 400 pixels – Resolution = 72 pixels – Background color = Transparent – Image type = 16.7 Million Colors (24 Bit) |
|||
 |
Set the foreground style to Null and the background sytle to Solid Color, background color to black. | |||
|
|
Now we will enter our text: Click on the Text tool and then into your image to open the Text dialog box. Use the following settings: Enter your text and click on OK to insert it into your image. You can change its position on the canvas by clicking and dragging. Go to Selections || Select None (Ctrl+D) to deselect the text. |
|||
 |
Now we'll add a bevel to the text which is essential for the liquid metal effect. Go to Effects || 3D Effects || Inner Bevel and change the settings as follows: Click on OK to apply the Inner Bevel effect. |
|||
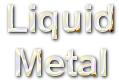
  Curves applied once  Curves applied twice |
And now the real trick ... Curves! Go to Colors || Adjust || Curves, and in the "Curves" dialog box, set Channel = RGB. On the Input / Output grid we will be working with four nodes. If you have less than four nodes, place your mouse pointer on top of the curve line until you see the +ADD sign and click to add a new node; if you have more than four nodes, click on the extra node and drag it off the grid. Now that you have four nodes to work with, you will be clicking on each one of them (to make it active) and on the Input and Output boxes you will be entering the settings as follows: Node #1 (bottom left corner of the grid): Click on OK to apply the adjustment. If you wish, you can go to Edit || Repeat Adjust Curves to apply it once again. |
|||
|
Finally, will give some emphasis to the text by adding a drop shadow: Go to Effects || 3D Effects || Drop Shadow and change the settings as follows: Click on OK to apply the Drop Shadow effect. From this point you can either merge all the layers or keep working on your image. For this example I merged the layers: Go to Layers || Merge || Merge All (flatten). |
|||
 |
Now don't worry if your final result looks a bit different from what is shown above – it seems to be different if only a little bit is changed. On the left you can see another image that I got with exactly the same technique, so maybe your outcome more resembles this one. | |||
