|
Lesson 13 of Zonia's PSP 8 Lessons > A Signature Tag |
||||
|
|
|||
| In this lesson we are going to create a signature tag using many of the features and effects that come with PSP. | ||||
 |
I am going to create a tag for a friend whose favorite color is Hunter Green. Since I don't know the code for hunter green I found a product on the internet that was hunter green. I copied the image and pasted it into PSP as a new image. | |||
|
|
I then selected the Dropper tool and changed the Sample size to 11x11 Pixels. I could have left it at 1 pixel but as you can see there is both light and dark, so by choosing 11x11 Pixels PSP will blend the light and dark, thus giving me a closer match. |
|||
 |
So, set your Foreground Material to color: Hunter Green (Red = 19, Green = 108, Blue = 114; #136C72) – or any other color of your choice – and your Background Material to Null. Since I don't want to go through this process next time I need Hunter Green I clicked on the Foreground box, then clicked on the Add to Swatches button and named it Hunter Green. Now I have the main color I am going to use selected and am ready to start. |
|||
|
|
Create a new image: Go to File || New (Ctrl+N): |
|||

|
Select the Preset Shapes tool: Starting at (x:200 y:200) and holding down the right mouse button (so we can draw from the center), drag to (x:350 y:350). |
|||

|
Select the Magic Wand tool with default settings and click inside your shape. Go to Selections || Modify || Expand: Number of pixels = 2. Go to Layers || New Raster Layer, then to Layers || Arrange || Send to Bottom. Click on the Flood Fill tool and fill the selected layer (the bottom layer) with a color of your choice. I chose a lighter green from the same color family by clicking into the Foreground Materials box and then clicking a little ways under the current circle in the color block (Red = 35, Green = 193, Blue = 199; #23C1C7). |
|||
 |
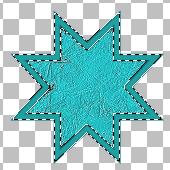
While still selected let's apply some effects to it. Go to Effects || Texture Effects || Texture with default settings, except Texture = Canvas. Click on OK. Then go to Effects || Art Media Effects || Brush Strokes. Choose the "Deckled" preset from the Presets drop-down list. Click on OK. Now deselect with Selections || Select None (Ctrl+D). Feel free to choose different effects. |
|||
|
Click on the 'Raster 1' layer. Select the Magic Wand tool (still with default settings) and click inside the two borders. Go to Selections || Modify || Expand: Number of pixels = 2. Go to Layers || New Raster Layer and then to Layers || Arrange || Send to Bottom. Click on the Flood Fill tool and fill the selected layer with a color of your choice. I chose a medium green from the same color family by clicking the into the Foreground Materials box and then clicking a little ways above the current circle in the color block (Red = 31, Green = 160, Blue = 161; #1FA0A1). |
|||
 |
While still selected let's apply some effects to it. Go to Effects || Texture Effects || Sculpture with default settings, except Pattern = Cracked Paint and Color = the medium color you chose. Click on OK. Then go to Effects || 3D Effects || Inner Bevel. Choose the "Cushion" preset from the Presets drop-down list and set the Color = the medium color you chose. Click on OK. Now deselect with Selections || Select None (Ctrl+D). |
|||
|
|
Set your Foreground Material to Null and the Background Material to a color of your choice. I chose Hunter Green. (You may need to first select another tool, e.g. the Pan tool or the Text tool that we're going to use now, before you can set the Foreground Material to Null.) |
|||
|
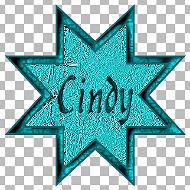
Click on the top layer in your Layer palette. Click on the Text tool (T): Create as = Vector. Click inside your shape to open the Text Entry dialog. Type in your name, use a font of your choice and size of your choice. Then, click on Apply. I used the boxes to resize my text and moved it where I wanted it. (To put it exactly in the center of the image you can go to Objects || Align || Center in Canvas.) Go to Selections || From Vector Object, then to Layers || Convert to Raster Layer. Now go to Effects || Texture Effects || Sculpture, same settings as before. Next to Effects || 3D Effects || Inner Bevel. Choose the "Pillow" preset from the Presets drop-down list, Color = Hunter Green or the original color you chose. Click on OK and deselect (Ctrl+D). |
|||

|
Click on the Selection tool (S) and then on the Merged Opaque button in the Tool Options palette. Go to Selections || Modify || Expand: Number of pixels = 20. Then go to Image || Crop to Selection (Shift+R). Go to Layers || New Raster Layer and then to Layers || Arrange || Send to Bottom. Click on the Flood Fill tool and fill the new layer with your original color. Now go to Selections || Select All (Ctrl+A), then to Selections || Modify || Contract: Number of pixels = 15. Go to Selections || Invert. |
|||
 |
Go to Effects || Texture Effects || Sculpture with default settings, except Texture = Cracked Paint and Color = the medium color you chose.Click on OK. Go to Effects || 3D Effects || Inner Bevel. Choose the Cushion preset from the drop down list. Color = the medium color you chose. Click on OK. Now deselect with Selections || Select None (Ctrl+D). Then go to Image || Resize and resize by 75 Percent. Last go to Layers || Merge || Merge All (Flatten) and to Adjust || Sharpness || Sharpen. Save your signature tag (File || Save). |
|||
| That's it, just a quick and simple tag using some of the effects that come with PSP 8. | ||||
