|
Clone Brush Tutorial |
||||
|
|
|||
| Today we are going to use the Clone Brush to take the subject from one photo and add it to another. | ||||
|
First you need to download the zip file of the two images. | |||
| Open both images in PSP and duplicate them with Shift+D (Window || Duplicate) to keep the originals. Make sure you're viewing both at normal view (1:1). To do this, click on View || Normal Viewing. | ||||
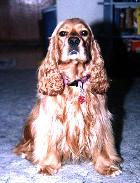 |
Now what we want to do is place the bird from the cockatiel photo on top of the dog's head. The first thing you will probably notice is that the bird is almost the same size as a dog. Before we combine the images, we must get them both to the same scale. Since images tend to reduce better than they enlarge, we are going to make our bird image smaller. With the bird image active, go to Image || Resize: |
|||
|
|
Now click on the Clone Brush (looks like two brushes, one just an outline): Shape = Round Size = 6 Hardness = 30 Opacity = 100 Step = 25 Density = 50 Tab 2: Clone mode = Aligned |
|||
 |
Right-click on the middle of the bird's body. This selects the point of origin for when we begin to copy or clone the bird image. | |||
 |
Switch to the dog image. Begin to paint about 1/8 to 1/4 inch above the dog's head, using the left mouse button. You should see the image of the bird begin to appear above the dog. Note that as you paint, the brush keeps your place in the bird image. If you stop painting, move the cursor, and begin painting again, it changes its point of reference to correspond with the movement. |
|||
|
Continue painting until you have completely reproduced the bird in the dog image. Try to transfer over as little of the bird image background as possible. You should now have an image of the bird on the dog's head. However, unless you have a really steady hand, you probably need to clean it up a bit. |
||||
| Zoom in several times to get a closer look at the bird you added to the dog image. | ||||
| Switch back to your Clone Brush tool and in the Tool Options palette, change the brush size to 1. | ||||
 |
Now right-click on the wall behind the bird and dog. Click close to the bird but make sure you are clicking on the original background, not the part you copied over. This sets a new point of reference for the Clone Brush. This time you are copying a portion of this image over the "cloned" background to make it blend in. Left-click to paint over the edges to return it to the original background. Zoom in more if necessary. |
|||
 |
If you notice that the background of your painting isn't matching well, right-click in a more suitable area to reestablish an appropriate point of reference. (For instance ... when you work on the areas on the dog, you need to choose a point of reference on the dog, not the wall.) Continue to do this until you are satisfied with the image. You may want to use the Retouch tool for a final blending of the images. That's all there is to it. |
|||
