 |
 Home > Tutorials > Basics > Home > Tutorials > Basics >
Painting a Line Drawing with PSP
|
|
|
Painting a Line Drawing in PSP
Created by: Rosebear
|
|
|
|
This tutorial shows how to paint a line drawing and give it
dimension by adding shading with our airbrush tool. The download file contains
the images needed to complete this tutorial.
|
|

|
To paint a black and white line drawing from the very beginning would take more time than we have in class. At the end of this lesson you will find the steps needed to color a line drawing.
We will begin this lesson with the colors already in the drawing.
|
|
|
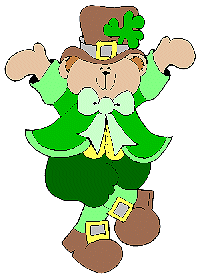
Open and use the colored image 'bear-wrking.psp' for this lesson.
Duplicate it by pressing [shift] + [d] to preserve the original. Close the original.
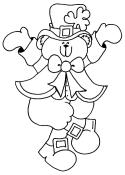
(Note: The original line drawing '/tutorial/html/tutbasic/bear_lines.gif' (shown above) is also included so you can try your hand at working from scratch.)
|
|
|
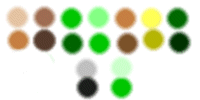
Also open the color palette 'Irish Bear Palette.psp' for this lesson. The palette is set up so that the color chosen for shading is directly beneath the main color.
|
|
|
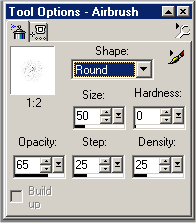
Select your Airbrush tool with the following settings. These will remain the same throughout the lesson. The only thing we will change is the size.
- Shape = Round
- Size = 50
- Hardness = 0
- Opacity = 65
- Step = 25
- Density = 25
|
|
|
|
Click on the Magic Wand tool  on your tool bar.
- Match Mode = RGB Value
- Tolerance = 10
- Feather = 0
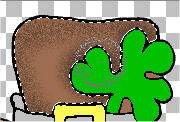
Click on the top of the hat to select it, and make a new layer named "hat top."
|
|
|
Select the Brown for the Hat Shadow (Dark Brown beneath the Hat Brown). Use the Dropper Tool and set Foreground To Dark Brown (left click).
Click on the Airbrush tool and shade the edges of the bear's hat.
Let the "paint" build up a little more beneath the
shamrock. Notice how the shamrock isn't being painted at all?
|
|
|
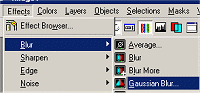
Apply Gaussian Blur:
Effects || Blur || Gaussian Blur with Radius = 8.00;
Click "Ok"
If there is enough shading to suit you, deselect. If not repeat
the step. Remember, Undo is your friend!
|
|
|
|
Repeat this process for the brim of the hat.
- Highlight the Merged Layer
- Use the Magic Wand and Select the Brim
- Create a New Layer, name it 'Brim'
- Use the Air Brush with the Same Dark Brown
- Use Effects || Blur || Gaussian Blur with same values
- Use [Control] + [Z] (Undo) until you have what you like
- Deselect: [Control] + [D]
|
|
|
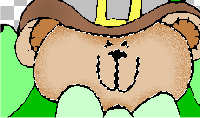
Repeat the process for the face of the bear. Let the paint build
up a little extra where the bear's face would have a shadow from his
hat.
- Highlight the Merged Layer
- Use the Magic Wand and Select the Face
- Create a New Layer, name it 'Face'
- Use the Dropper Tool and select the Face Shadow from the Irish Bear Palette
- Use the Air Brush and paint the shadow, more under the brim
- Use Effects || Blur || Gaussian Blur with same values
- Use [Control] + [Z] (Undo) until you have what you like
- Deselect: [Control] + [D]
|
|
|
|
Continue selecting areas from the "Merged" layer, making
new layers and shading the bear. Take care that you don't select
portions which are too close to one another at one time. For example, don't shade the arms of the jacket at the same time you're shading the
body of the jacket. You need that separation so that you can apply
shading that looks natural.
|
|
|
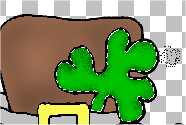
When you're working on smaller areas you may wish to change the
size of the airbrush. Working on the shamrock I found a size 20
brush was much easier control. All other settings remain the same.
Just use these general steps to shade each area.
- Highlight the Merged Layer
- Use the Magic Wand and Select the Area Wanted
- Create a New Layer and Labeled it with name of that area
- Use the Dropper Tool and select the Shadow for that Area from the Irish Bear Palette
- Use the Air Brush and paint the shadow
- Blur with Gaussian Blur
- Use [Control] + [z] (Undo) until you have what you like
- Deselect: [Control] + [D]
- Then repeat for another Area
|
|
|
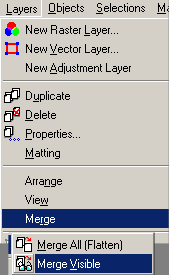
When you have completely shaded the bear, Merge the visible
layers. This will maintain a transparent background for you.
Click on the "New Layer"  icon in your layer palette to create a
new layer, name it "background" and drag it to the bottom in your layer palette with the mouse. icon in your layer palette to create a
new layer, name it "background" and drag it to the bottom in your layer palette with the mouse.
Save your Image as a PSP file to preserve your work.
Then, Turn Off that Background Layer by clicking on the eyeglasses in the layer palette. Highlight the top Layer.
|
|
|
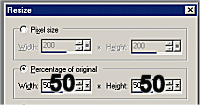
Go to Image || Resize and reduce the image to 50% of the original
size. The default settings are fine. Make sure that Resize All
Layers is checked.
|
|
|
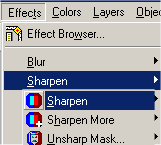
Click on Effects || Sharpen || Sharpen to make the image more
clear again after reducing it.
|
|
|
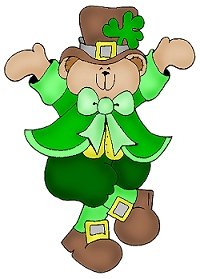
And here's our bear! Choose a background color or image of that
you like and flood fill the "background" layer. I used a
simple white background here. Then save your image for use on a web page or in email.
|
|
|
Beginning from Scratch.
To begin from scratch with a line drawing, make sure that you are
using 16 million colors by clicking Colors || Increase Color Depth
|| 16 Million (24 bit).
Either Select a Line Drawing image you like or create one using the Draw Tool with the Freehand Option.
Make sure in the Layer Palette that the Layer is a Layer and not a Background. You want a transparent layer visible behind the line drawing. If you are going to use a Line Drawing Image, Open a new canvas with a transparent background and then paste the line drawing as a New Layer.
Rename this layer Drawing.
|
|
|
|
Next,
Working from the drawing layer, you will be selecting each
individual area for coloration. Click in an area on the drawing to select it.
|
|
|
|
Click on the new layer icon in the icon palette. Name the layer
according to the area you have selected, as you did when you were
shading.
|
|
|
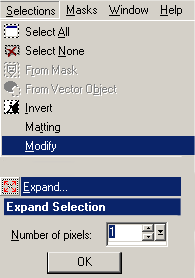
Expand the selection by clicking on Selection || Modify || Expand. The Expand Selection box will pop up. Expand Selection by 1 pixel, and click "Ok."
|
|

|
Flood fill your selection in it's new layer with the color of your
choice or one of the palette colors provided. Deselect.
To fill more than one area with the same color, such as the
bear's paws and face, using the Magic Wand on the drawing layer,
click in one area to select it, then hold down the [Shift] key and
click in another area to ADD it to your original selection. When you
flood fill any of the selection, the entire selection will be
painted at the same time!
|
|
|
|
Repeat these steps for each area until the image is
completely colored. Take care to always select on the drawing
layer and fill on a new layer.
|
|
|
|
When you have completely painted the entire image, use the Magic
Wand to select the area outside of the drawing and delete the
background so that you have a transparent background you can flood fill as
you choose.
|
|
|
|
That brings us almost to where we began this lesson. At
this point you may merge your layers as I did, maintaining the
drawing layer as a separate layer (make it invisible by clicking on
the little glasses on that layer in the Layer Palette before you
Merge || Merge Visible Layers or you can work from your
existing layers.
You can also shade your layers as you flood fill them. You follow
the same procedure. You want to keep the area selected from flood
fill until the shading is finished.
|
|
|
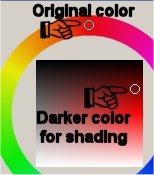
Working on a line drawing of your own is a lot of fun. Choosing
the colors is very easy. After you have chosen the base color to use
to fill the selection, open the color palette again and choose a
darker shade of the same color for shading. Experiment until you
achieve the effect you want.
Have fun -- Rosebear --
|

