|
Create an image in PSP6
300 x 400 with a white or transparent background. I usually keep the backgrounds
white so I can see what I am doing more easily. Then select a light foreground
color in the color panel. I chose a light blue, (R: 192, G: 255, B: 255)
but any color will do.
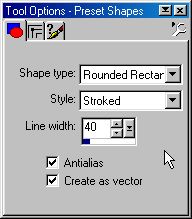
 Select the preset shapes in the tool options and then select Rounded Rectangle
|| stroked || line width=40 in the toggle panel with antialias and vector
checked.
Select the preset shapes in the tool options and then select Rounded Rectangle
|| stroked || line width=40 in the toggle panel with antialias and vector
checked.
|
| |
|
 
|
Draw a large rectangle
in your image as in the one on the right. This will automatically create
a new vector layer which is perfect for later as we will be using separate
layers to create our frame.
Now open the toggle layer
panel and convert the frame layer from vector to raster by right clicking
on the frame layer (Layer 1) and choosing Convert to Raster.
Do not merge the layers.
|
| |
|

|
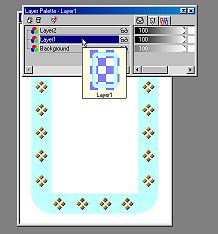
Leave that image for
a minute and create a new one, 100 x 100 with a white background. Then
press on the font button to open the dialogue box and choose your font.
I chose Wingdings, small letter "v", size 26, floating and antialias checked.
Pick a color for the font which is noticeably different from the frame
color. I chose a light gray (R: 192, G: 192, B: 192). |
| |
|

|
Go to Edit || Copy, click
on the frame image to select it, then go to Edit || Paste as New Layer
and move the Wingding so it is placed over the frame near the top left
hand corner as in the picture on the right. |
| |
|
|
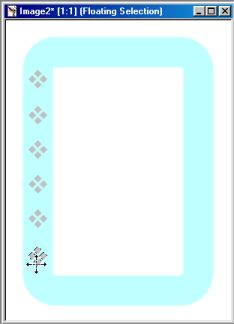
Now go to Edit || Paste
as New Selection and place the new wingding about a half an inch down the
left hand side of the frame. Continue to do this until the left hand side
is filled with wingdings at an equal distance from one another. (You can
always use your grid to place them perfectly if you have trouble guessing
the distances needed between them.)
Then repeat the process
for the top of the frame.
|
| |
|
 
|
Now we're going to fill
in the bottom and right hand sides of the frame. Push on the Selection
Tool option and choose a rectangle as the Selection type. Then draw a rectangle
around the wingdings at the top of the frame. Go to Edit || Copy, Edit
|| Paste as New Selection and place the resulting selection of Wingdings
at the bottom of the frame.
Repeat the above process
for the Wingdings on the left of the frame to fill in the right hand side.
(Again here you can use a grid to align them perfectly if you'd like.)
Deselect all.
|
| |
|
|
It's time to sculpture
our wingdings.
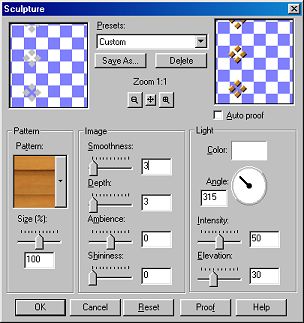
Go to Image || Effects
|| Sculpture to open the Sculpture Dialogue Box. At the top you'll find
the PSP presets. Choose the "Pine" preset and reduce the depth to 3 and
the smoothness to 3.
Click okay and you'll
see our wingdings have transformed!
|
| |
|
|
Let's work on the other
part of the frame:
Open the toggle layer
panel and choose the frame layer (Layer 1).
Go to Image || Effects
|| Sculpture and choose the preset "Mahogany". Reduce the depth to 10.
|
| |
|
|
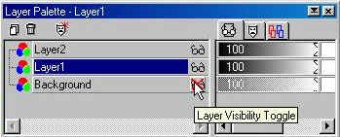
We're going to merge
the frame layers now.
First go to the layer
toggle palette and make the background invisible by pressing on the Layer
Visibility Toggle (the little glasses) as in the image here on the left.
|
| |
|
|
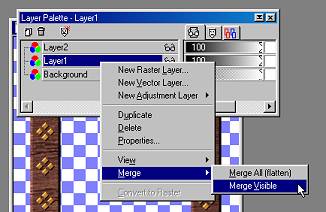
Now right click on either
Layer 1 or Layer 2 and choose Merge || Merge Visible. The two parts of
the frame are now merged so we can make some shadow effects. |
|
|
|
Using the magic wand
choose the interior of the frame, then go to Selections || Modify || Expand,
and expand by 1 pixel.
Then go to Image || Effects
|| Cutout and choose the following selections:
Leave "Interior filled
with color" unchecked.
Opacity: 30
Blur: 10
Vertical: 10
Horizontal: 10
|
| |
|
|
Last step:
Click outside the frame with the magic wand as in the above image, then
go to Selections || Invert. Go to selections again and choose Modify ||
Contract and contract by 1 pixel.
Now go to Image || Effects
|| Drop Shadow and choose the following selections:
Color: Black
Opacity: 50
Blur: 10
Vertical: 10
Horizontal: 10
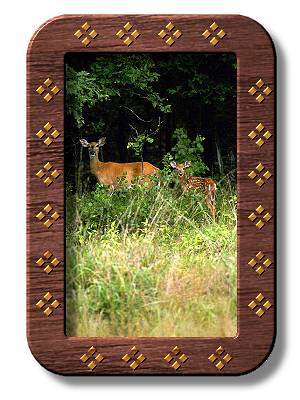
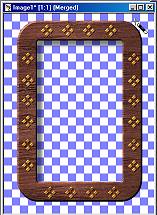
And there you have it!
Your frame is finished. If you want to save it as a picture tube, you'll
have to delete the background layer first in the layer toggle palette by
selecting it and then clicking the little trash can in the top left hand
corner. Or, in PSP 6 and higher, you can save it as a .pfr file in PSPs'
Frames directory.
Use your own fonts and
sculpture presets to make your own custom frames. Have fun!
|
|
| |
|