 |
 Home
>
Tutorials
>
Marble
Rooms Part 3 Home
>
Tutorials
>
Marble
Rooms Part 3
|
|
|
Marble Rooms part 3
Created by: CarolUK
|

|
|
This tutorial will show you a simple way to make
a marble room, with steps, pillars and windows. You can vary the number and
position of all the elements in it, to make your own individual room.
|
|
We need
pillars that will go almost the full height of our image, so it is easier to
make one in a separate, larger, image, as we did for the floor. So open a new
image, 300x500, transparent.
Use the selection tool
set at rectangle with feather 0 and antialias unchecked in the tool options
palette. Double click on the selection tool so that you can specify the size of
your selection precisely. Set the values as follows:
Left: 10
Right: 50
Top: 0
Bottom: 500
Custom size and position:
Checked
|
 
|
This will
give you a tall thin selection a little way in from the left of your new image.
With your marble texture as the background style (PSP
6 users: make sure Pattern is the flood fill style and that the marble image is
still the selected pattern), use the fill tool
and right click in this selection to fill it with the marble. Keep the pillar
selected, and use Selections || Float.
Now use Effects || 3d
Effects || Cutout (PSP 6 users: Now use Image || Effects || Cutout) and set the
following:
Offset
Vertical: 0
Horizontal: 14
Attributes
Opacity: 61
Blur: 39
Color: Black
Fill interior with color: Unchecked
Click OK
|

|
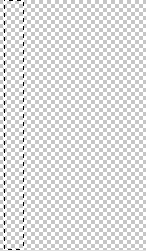
Your pillar should look like the one to the side. (Of
course a lot taller!)
There is
some darker shadow at the very bottom of our pillar that we need to get rid of.
(That at the top will disappear out of the image and not be seen, but the foot
of the pillar will be visible). So release the selection, select a small
rectangular selection that takes in the shadow at the bottom and then hit
delete.
Now use Edit || Copy. Make
your room the current image, make the top layer (steps 2) the current layer, and
use Edit || Paste || As New Layer. Rename the layer Pillar 1.
Use
the mover tool
to place the pillar to the left of your room and push it up till the bottom is
about half a centimeter from the bottom of your image.
|

|
The bottom
of the pillar has a very harsh line. Use the retouch tool with these tool option
palette settings:
Shape: Round
Size: 8
Hardness: 67
Opacity: 100
Step: 13
Density: 100
Build up: Checked (PSP
6 users: click on the cogs to set this)
Retouch mode: Soften (PSP
6 users: click on the cogs to set this)
Paper texture:
None
Sample merged:
Unchecked
In
versions 5 & 6 the tool type - soften here - is on a different tab in the
palette, rather than on the tab with the settings. Gently apply the tool
to the very bottom of the pillar, to soften that harsh line where it joins the
floor.
|

|
Now all we
need to do to add a second pillar is use Edit || Copy followed by Edit || Paste
|| As New Layer, and move the pillar over to the right side of the image. Rename
its layer Pillar 2. And that gives you your finished room.
The
elements we have made here are simply building blocks. By changing the marble,
rearranging things, using different sizes, you can get a completely different
room. The various parameters I have used in the tutorial are just sizes which
fit the size of image I was making here. If you make a bigger image you will
want to vary all of them to suit the proportions of your room, but you know now
how to do that.
|