|
(Prof's PSPv7 Effects and Techniques) > Blur Effect |
||
|
||
Blur, more often than not, is used to soften or blur shadowing effects. Of course, the effects is blur images and/or selections (areas). There is nothing fancy about using Blur but there are a couple of techniques that I often use to particularly soften edges of a shape (circle or oval). |
||
|
|
The Effects || Blur Average ... Has one option (Filter Aperture). Blur ... A quick, easy blur effect. Blur More ... Another quick, easy blur effect. Gaussian Blur ... Has one option (Radius). Motion Blur ... Options: Direction and Intensity. Soften ... A quick, easy soften effect. Soften More .. Another quick, easy soften effect. |
|
|
|
Exploration and Illustrations |
|

|
Basic Set UpCanvas: A. 300 x 300 White 16 M B. Promote Background to a Layer
Palette:
Styles:
Textures:
Use: Selection Tool
Create a New Layer Use: Selections || Save to Alpha Deselect [Control+D] |
|
|
|
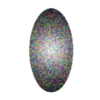
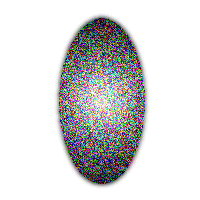
ILLUSTRATIONS: -- Experimenting with all blursIn the following exercises if their is a Blur Options window, just drag it below the canvas and do not click on OK. When there is no window, after using the option, just use Control+Z to return to the original image.1. In this exercise we will just run through the blurs and exaggerate the options when there are options to see how a particular blur works. (When using a feature for the first time, always start with the default setting as this gives you a basis to work from. In the Options window on the bottom right is a button next to HELP that looks like two X's with an arrow. Click on that button to set the default.) (When using an option, click on the DOWN ARROW between the two boxes. This action sets the effect so it will be seen in the right box and in the canvas. When you click on the EYE you will return to the original image. Thus, you are able to compare the effect to the original without having to set the option yet.) COMMENT ON ORIGINAL IMAGE: Note the edges of the oval are ragged. |
|
  Original Average -- Default  Average -- Maximum Blur |
A. Average: (Has options)Use Default Setting: There is very little change, though there is some blurring of the edges and noise.Then, set the Filter Aperture to maximum (31) and notice how the whole image blurs. Click on Cancel |
|
 Blur  Blur More |
B. BlurThis setting is a quick blur effect, fairly close to the default setting used above.Use: Undo [Control+Z] C. Blur More:This setting is a better blur effect for the edges and softens the middle a bit. This setting is close to the Average with filter set to 5.If you use the zoom tool and zoom to about 7:1 on an edge you will see how blur works by setting various pixels on the edge to various shades of grey and color (or transparency). Return to 1:1 zoom Use: Undo [Control+Z] |
|
  Default: Radius = 1 Radius = 25   Radius = 6 Radius=2 |
D. Gaussian Blur:Default: Radius = 1. Note how this sets the edges to a softer value than Average default.Set Radius = maximum (100). Note that now there is only a grey haze on the canvas. Reset Radius = 50, then 25, then 12, then 6, then 2. Gaussian blur uses transparent pixels to cause the shadowing effects seen. Although the Gaussian effect appears similar to the other blurs it in fact uses more transparent pixels to create the effect. Click on Cancel |
|
 Default Motion Blur 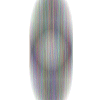  Motion = Maximum Motion = 20, Angle = 45  Soften  Soften More |
E. Motion Blur.Default: Angle = 0 and Pixels = 4 : This effect actually causes the pixels to move up vertically by 4 pixels.Set Pixels = Maximum (40). Now you see the real action of motion. Set Angle = 45, Pixels = 20 (The motion angle has now changed). Click on Cancel F. Soften acts much like blurUndo: [Control+Z] G. Soften More acts much like blur more.Undo: [Control+Z] |
|
|
Blur just the EdgesUse: Selections || Load from Alpha Selections || Invert Selections || Modify || Expand with value of 1 Selections || Save to Alpha We now have a selection that allows just 1 pixel on the edge using the inverted and modified selection. Rather than going through each Blur option, lets just use the Gaussian Blur to soften the edges. Effects || Blur || Gaussian with value of 10 [Note that not only have we softened the edge we have given the oval a slight shadow] Change Value = 2, click on OK and then deselect to view the result. We have a very nicely soften edge. This technique is the one I often use to soften edges of circles and ovals and other shapes. |
|
 
|
Next, use: Selections || Load from Alpha the Oval selection, (not the Inverted selection). Then, use 'Motion Blur' and find a nice effect playing with the angle and number of pixels. Click on OK but do Not Deselect. Just use another blur at a low value to blur the lines drawn with motion blur.
|
|

|
Finally, one last experiment now is to use Colorize and see what other colors you can create. -- Have fun. |
|
