 |
 Home > Tutorials >
Photographic Enchancements > Home > Tutorials >
Photographic Enchancements >Photo Aging |
|||
|
|
|||
| This tutorial will show you how to "age" a photo with the help of Paint Shop Pro in only a couple of steps. | ||||
|
For this tutorial, I used one of the photos that came with PSP (girls.jpg). If you don't find it in your Sample Images folder (within your PSP programme folder) you can get it with the download file on the left. Of course you can also take any other photo of your choice. | |||
 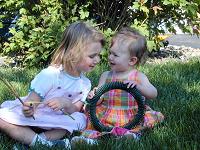
|
Open your photo in PSP, duplicate it with Window || Duplicate (Shift+D) and close the original image. In case you're working with a photo of your own and not that from the download file, you should now check the Layer palette if there is only one background layer (if not, go to Layers || Merge || Merge All [Flatten]) and if the color depth is 16 Million Colors (Image || Increase Color Depth || 16 Million Colors). Then promote the 'Background' layer to a raster layer. To do this, go to Layers || Promote Background Layer. |
|||
 |
Then you add a Mask layer by going to Layers || New Mask Layer || From Image. This opens the Add Mask From Image dialog in which you choose: |
|||
 |
Click on the lower, 'Raster 1' layer in the Layer palette, and add a new layer on top of it (Layers || New Raster Layer). This has the effect of having added a new layer ('Raster 2') between the original image layer and the mask layer. And we want to fill that new layer now. |
|||
   
|
In the Materials palette, set the Foreground material to Pattern, click into the Foreground material box and set: It's important to have "All tools" checked. |
|||
  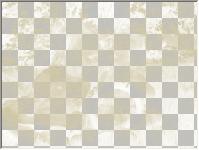
|
Now activate the Flood Fill tool and reset to default, then change: Check again whether the middle layer ('Raster 2') is selected in the Layer palette, and fill it with the pattern. The result (on the left) looks a bit strange – but only for a minute. |
|||
 |
In the Layer palette, click on the top line ('Group - Raster 1') and add a new raster layer (Layers || New Raster Layer). | |||
 |
Drag this new layer ('Raster 3') below the layer group. Be careful not to add it to the group but to have it standing alone below the group (check the screenshot on the left). | |||
 |
Set the Foreground Material to Color and choose black as your Foreground color. Check that the new bottom layer is selected in the Layer palette and fill it with the black color. |
|||
 |
As a final touch you may try to play with the Opacity of the mask layer ('Mask - Raster 1') to give it an even more interesting touch. In the example on the left the Opacity was reduced to 50%. That's it: an old-looking, quite old-fashioned style photo! |
|||


